hexo 框架的介绍和使用
官网:Hexo
GitHub:hexojs/hexo
hexo 的介绍
快速、简洁且高效的博客框架
Hexo是一款基于Node.js的静态博客(无需与后台交互,全由静态页面组成)框架,依赖少易于安装简单,更主要的是它免费,而且可以轻松的将生成的静态网页托管在GitHub,码云和Coding上,搭建博客首选框架之一。
hexo 的简单安装和使用
安装
npm 包管理工具
npm install hexo-cli -g下载的资源是国外的可能比较慢 淘宝镜像(代理的仓库)
npm install hexo -g --registry=https://registry.npm.taobao.org使用
在一个空目录(hexo init)博客系统的初始化
hexo\source\_posts md文档就是博客文档
如果要写一篇博客
新建文件 xxx.md把 md 文档转 html 文件
hexo g在自己的服务器预览
执行命令:hexo s
打开链接:localhost:4000如果从新生成 html 文件可能会有缓存
清除缓存命令:hexo clean
重新执行md转html命令:hexo g和 github 关联 推代码到 github:hexo-deploy-git 插件
npm install hexo-deployer-git --save和 github 关联需要配置文件:修改文件 _config.yml 在最下面添加
type: git
# 在github配置仓库 名称
repo: git@github.com:用户名/用户名.github.io.git
branch: master把代码推到 github
hexo d只能预览代码 无法预览页面 --> 配置当前仓库可以通过网络访问页面
在仓库的首页 settings ---> GitHub Pages --> 改选项 Source
none---master branch通过 用户名.github.io 访问你的博客
Hexo 本地搭建
在你选定的磁盘里,建一个文件夹专门用来存 myblog博客相关的文件。 文件夹内右键打开 Git Bash Here,在此窗口内执行以下所有命令。

1、安装 Hexo
用npm安装hexo,由于国内网络高“墙”深院,避免安装缓慢或失败,这里切换阿里的NPM镜像,没办法只能采用迂回战术了。
npm install -g cnpm --registry=https://registry.npm.taobao.org用 cnpm 安装 hexo
cnpm install -g hexo-cli安装可能有一些缓慢,当然这还是取决于你的带宽,这个过程中会出现的WARN提示不用理会。
cnpm install hexo --save到这hexo就安装好了,检查一下hexo -v是否安装成功
$ hexo -v
hexo-cli: 3.1.0
os: Windows_NT 10.0.18362 win32 x64
node: 12.16.1
v8: 7.8.279.23-node.31
uv: 1.34.0
zlib: 1.2.11
brotli: 1.0.7
ares: 1.15.0
modules: 72
nghttp2: 1.40.0
napi: 5
llhttp: 2.0.4
http_parser: 2.9.3
openssl: 1.1.1d
cldr: 35.1
icu: 64.2
tz: 2019c
unicode: 12.12、初始化 Hexo
Hexo安装完以后需要进行初始化操作。
$ hexo init注意:这时需要在myblog文件中,创建一个新的文件夹用来存放hexo博客文件。否则执行hexo init命令会报错。

进入hexo文件夹内右键打开 Git Bash Here,在此窗口内执行后边的所有命令。
$ hexo init
FATAL D:\myblog not empty, please run `hexo init` on an empty folder and then copy your files into it
FATAL Something's wrong. Maybe you can find the solution here: http://hexo.io/docs/troubleshooting.html
Error: target not empty
at Context.initConsole (C:\Users\51536\AppData\Roaming\npm\node_modules\hexo-cli\lib\console\init.js:23:27)初始化成功后,hexo文件夹内会出现如下的文件:
node_modules: 依赖包 public:存放生成的页面 scaffolds:生成文章的一些模板 source:用来存放你的文章 themes:放下下载的主题 _config.yml: 博客的核心配置文件(设置主体、标题等属性)

接着需要执行一下cnpm install命令,要不下边的启动会提示命令不合法。
cnpm install最后用 hexo s -g 命令来启动安装好的 hexo。
$ hexo s -g
INFO  Start processing
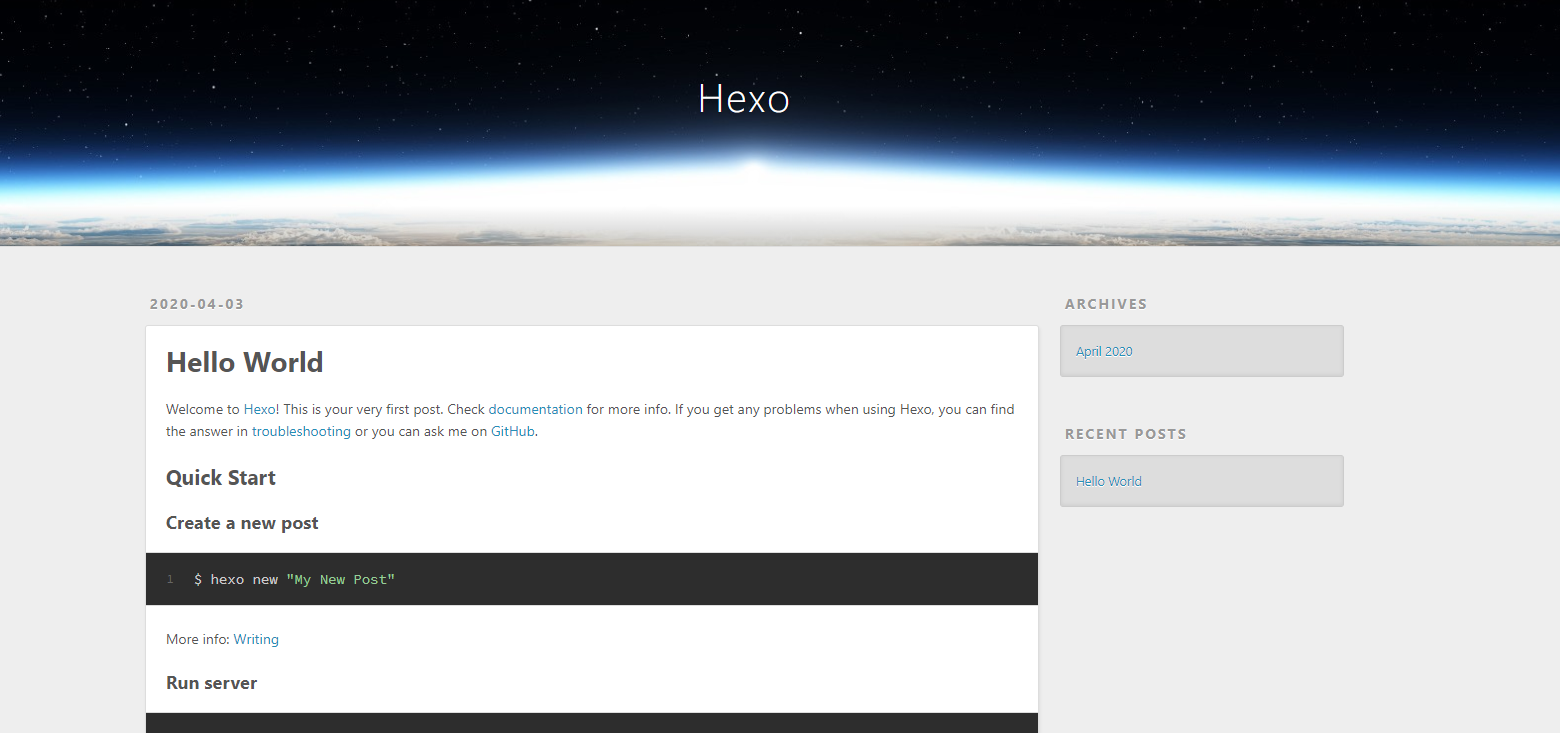
INFO Hexo is running at http://localhost:4000 . Press Ctrl+C to stop.直接访问http://localhost:4000显示如下页面,本地博客搭建成功。
Hexo 托管至 GitHub
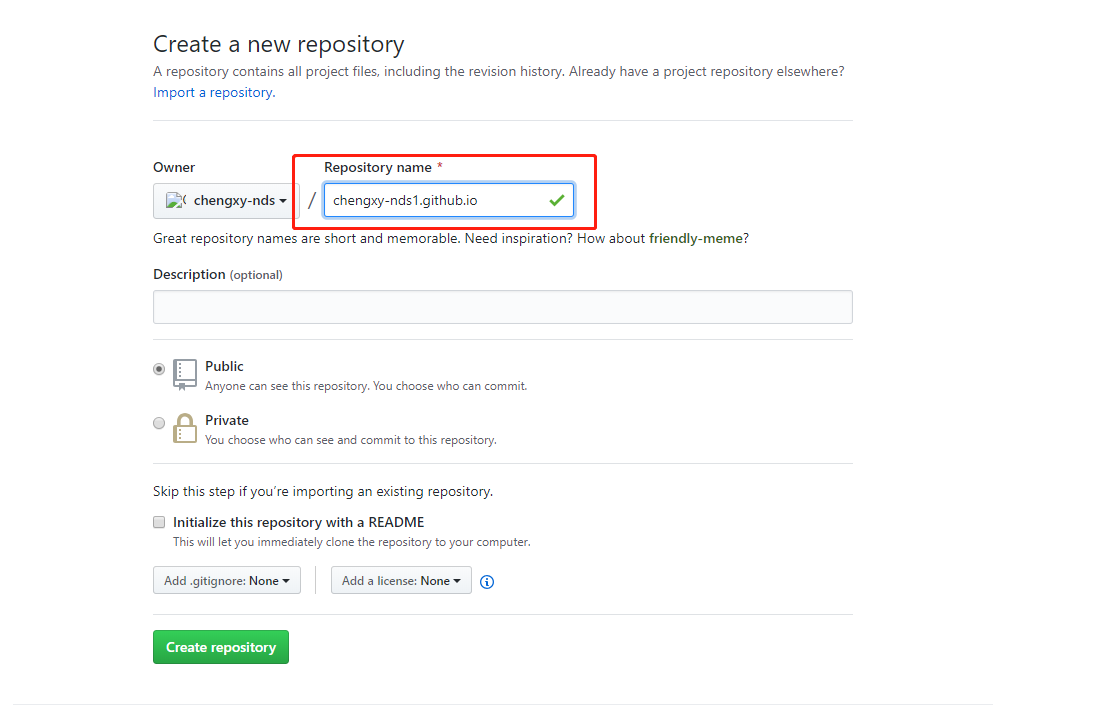
1、创建GitHub仓库
这时候需要我们在GitHub上创建一个仓库,设置仓库的名字以XXX.github.io结尾
2、配置_config.yml文件
修改_config.yml文件,添加你创建的GitHub仓库地址
deploy:
  type: git
  repo: https://github.com/YourgithubName/YourgithubName.github.io.git
branch: master安装部署命令deploy-git ,这样你才能用命令部署到GitHub。
$ cnpm install hexo-deployer-git --save上边修改完毕以后,依次执行以下命令,提交本地hexo文件到GitHub。
hexo clean
hexo generate
hexo deploy3、线上测试
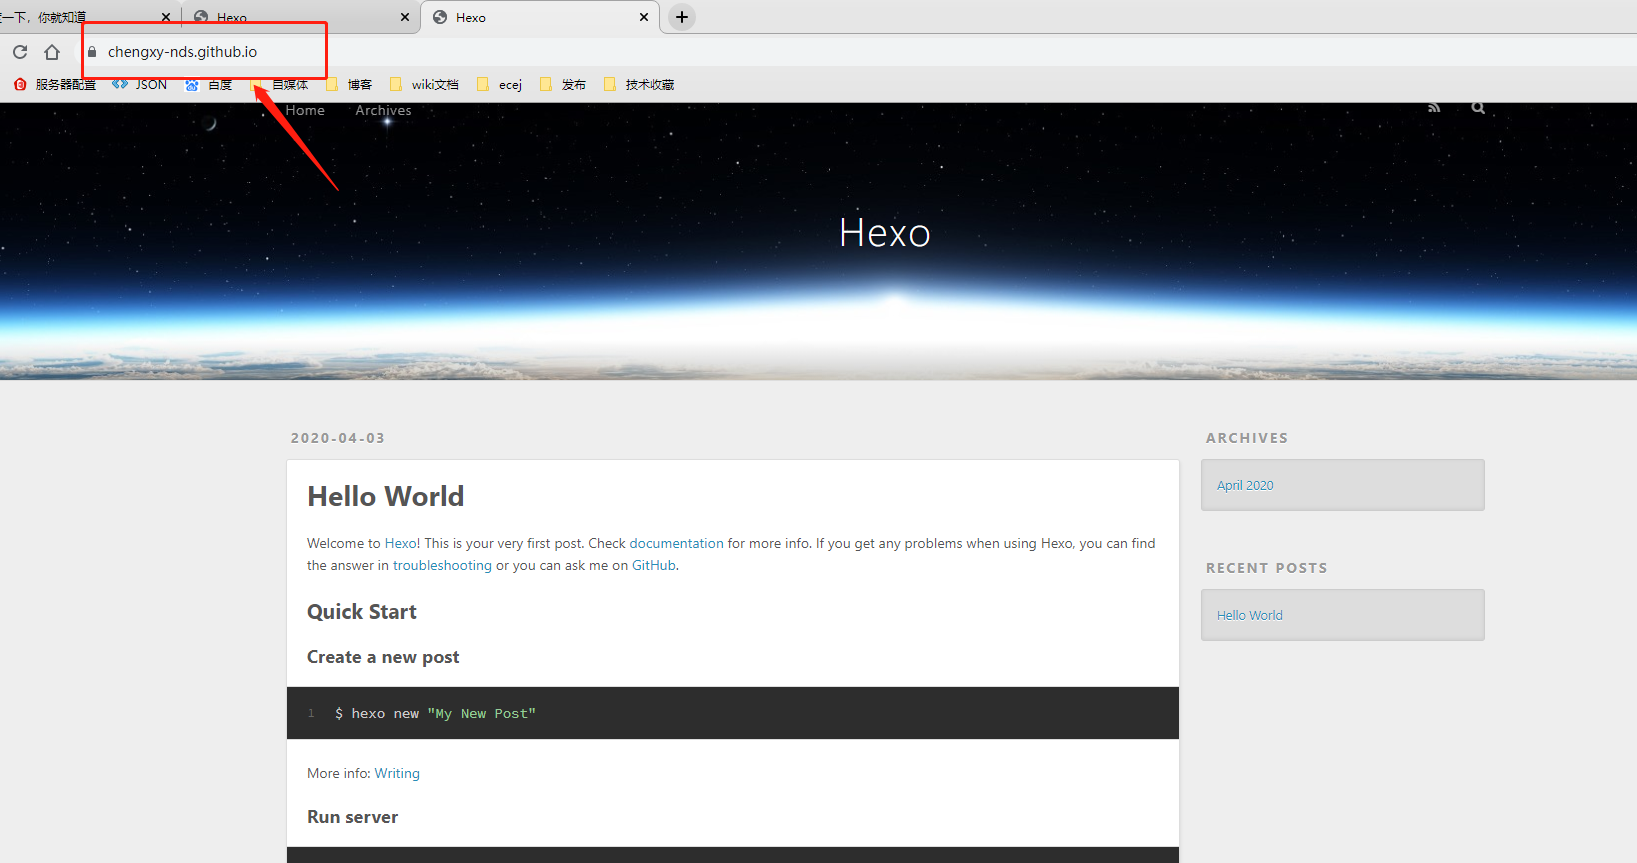
访问刚创建的仓库:https://chengxy-nds.github.io/,文件推送至GitHub后页面显示会有一定的延迟,稍等几十秒再次刷新页面,看到下边这些页面就表示博客部署成功。
4、设置个人域名
现在我们的博客地址:https://chengxy-nds.github.io/,但是看着是不是觉得有点low,如果有钱自己可以买一个域名。在云平台随便买一个,看自己喜好,例如:chengxy.com。
将域名指向GitHub的服务器地址, 192.30.252.153 和 192.30.252.154 。
进入存放博客的GitHub仓库,点击settings,设置Custom domain,输入域名chengxy.com
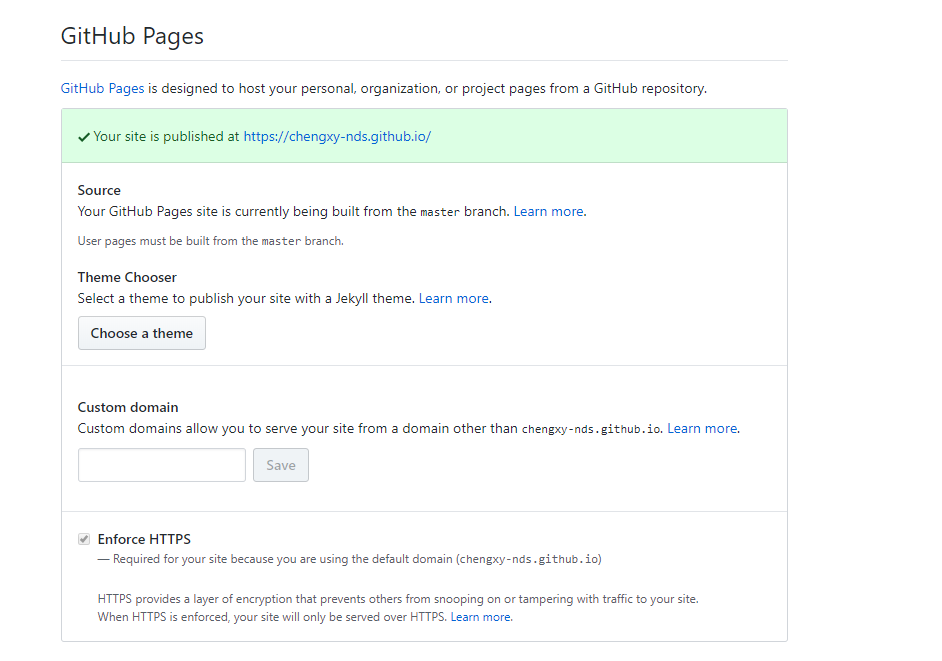
然后在本地博客文件source中创建一个名为CNAME文件,不要后缀。写上你的域名。

最后重新编译上传文件,访问:chengxy.com即可。
hexo clean
hexo generate
hexo deployHexo主题切换
虽然我们的博客搭建完成,但大家肯定也发现,现有的博客样式丑爆了,这时候就需要到官网挑一个自己喜欢的风格了。
1、下载主题
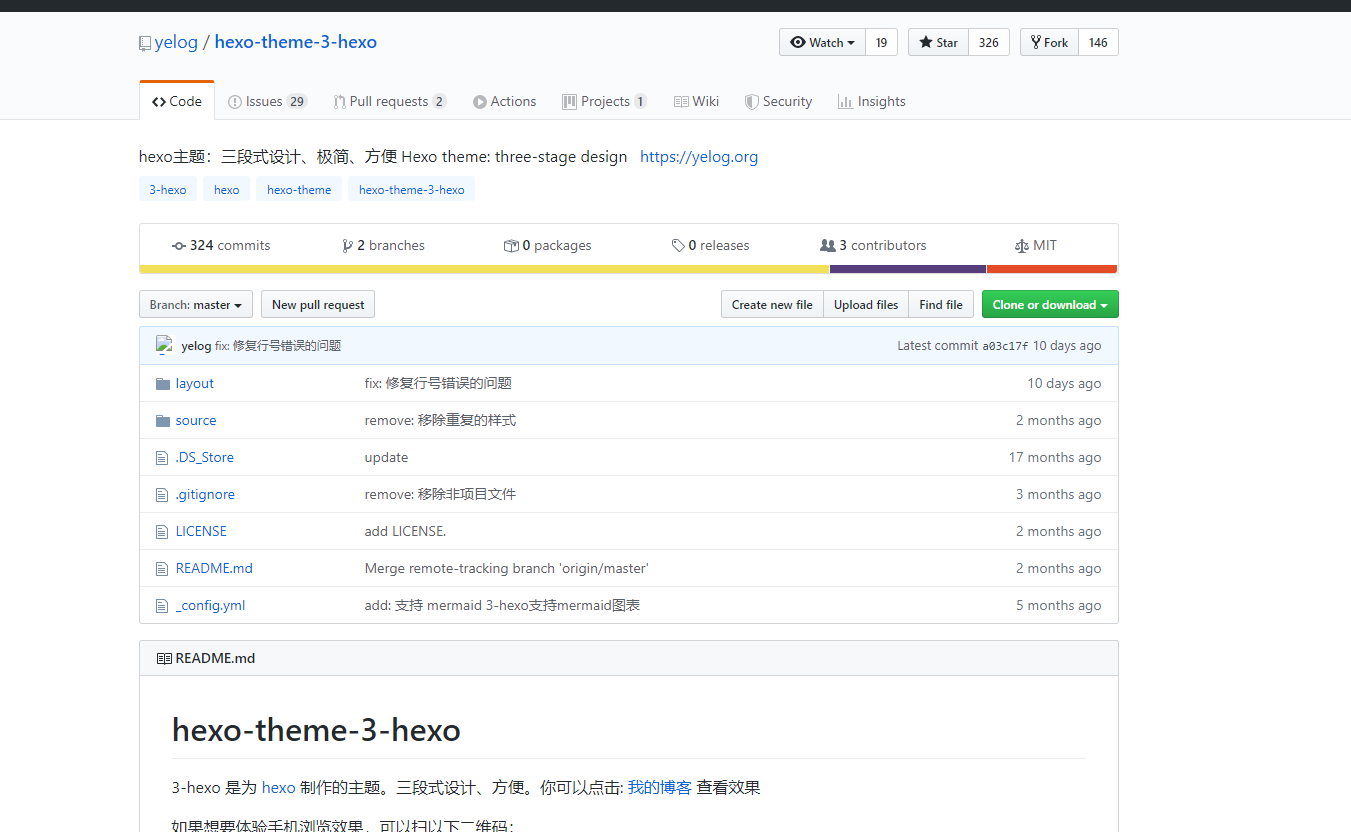
hexo主体官网:https://hexo.io/themes/,我们随便找一个主题替换演示一下,主题都托管在github上,直接clone就好。
2、配置_config.yml
可以看到hexo 只有一个默认的主题theme,现在进入theme文件夹执行git克隆命令,或者直接下载一个主题放入theme文件夹内都可以。
git clone https://github.com/yelog/hexo-theme-3-hexo.git修改_config.yml文件中的theme属性
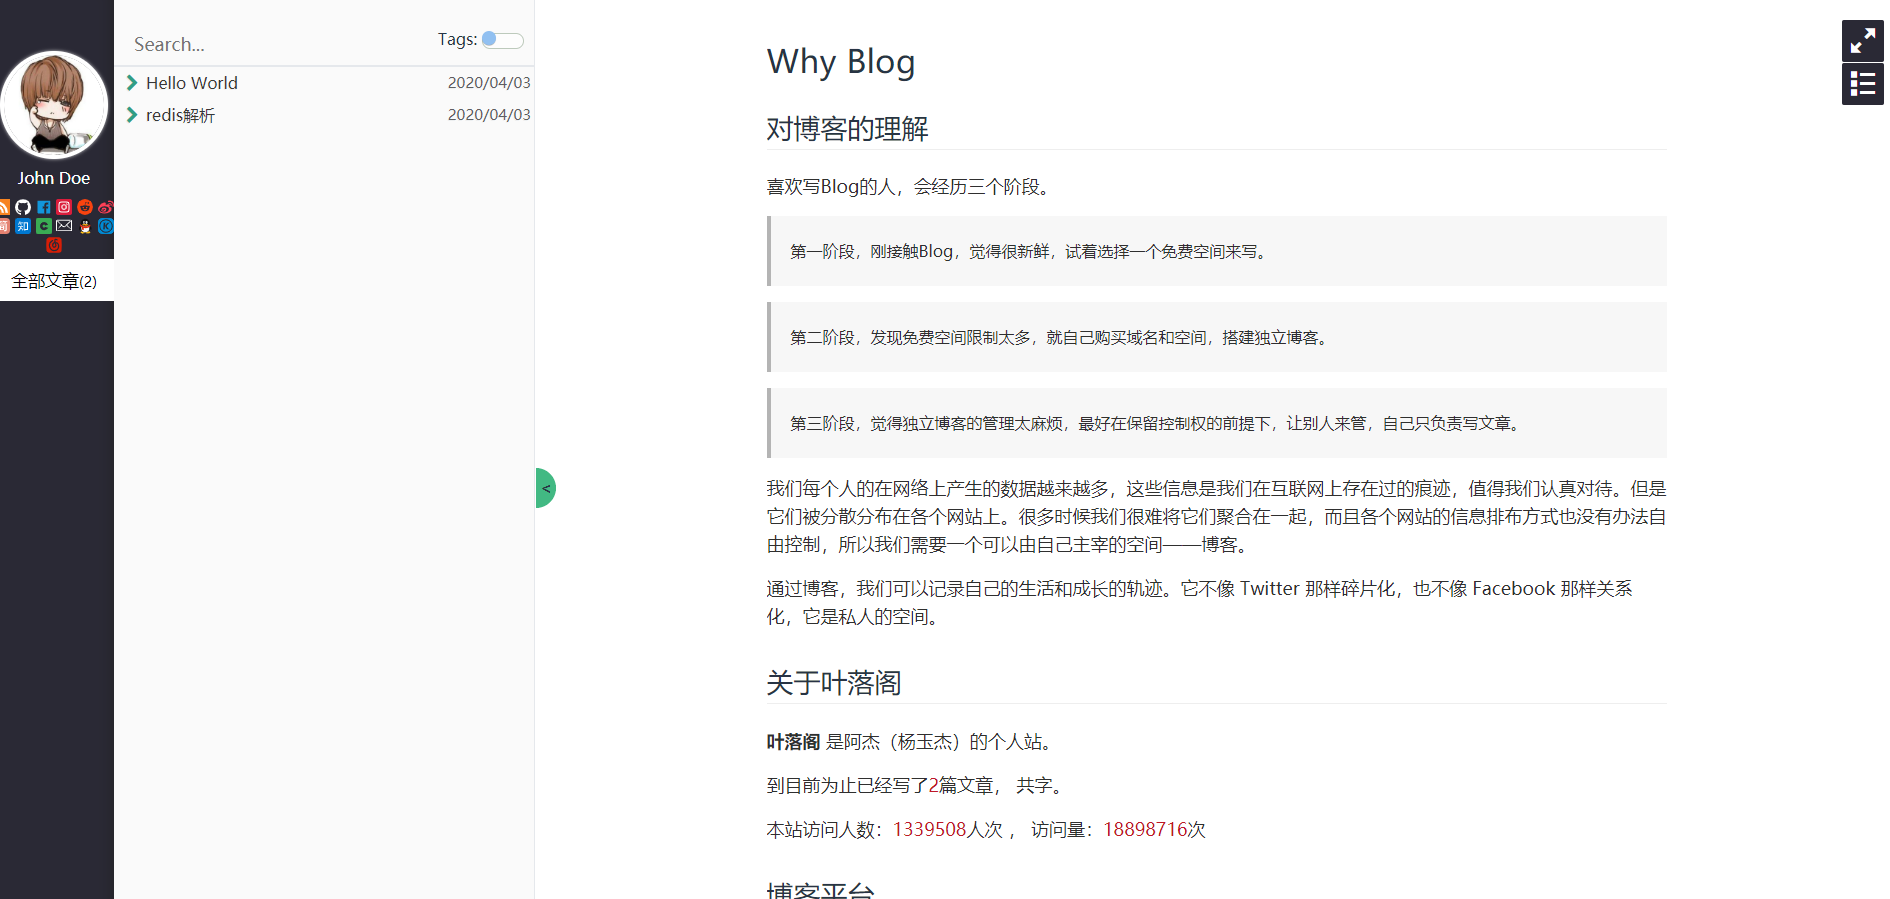
theme: hexo-theme-3-hexo打包上传看看效果:
hexo clean
hexo generate
hexo deploy3、测试
nice!主题已经替换成功,是比自带的好卡不少
Hexo基本操作
博客搭建完,接下来就要开始写博客,管理博客了~
创建我们的第一篇博客,会在source\_posts目录下生成一个程序员内点事的第一篇博客.md文件
hexo n 程序员内点事的第一篇博客hexo基本配置
_config.yml是hexo框架最核心的文件,博客的配置基本在这里。
#博客名称
title: 我的博客
#副标题
subtitle: 一天进步一点
#简介
description: 记录生活点滴
#博客作者
author: John Doe
#博客语言
language: zh-CN
#时区
timezone:

#博客地址,与申请的GitHub一致
url: http://elfwalk.github.io
root: /
#博客链接格式
permalink: :year/:month/:day/:title/
permalink_defaults:

source_dir: source
public_dir: public
tag_dir: tags
archive_dir: archives
category_dir: categories
code_dir: downloads/code
i18n_dir: :lang
skip_render:

new_post_name: :title.md # File name of new posts
default_layout: post
titlecase: false # Transform title into titlecase
external_link: true # Open external links in new tab
filename_case: 0
render_drafts: false
post_asset_folder: false
relative_link: false
future: true
highlight:
  enable: true
  line_number: true
  auto_detect: true
  tab_replace:

default_category: uncategorized
category_map:
tag_map:

#日期格式
date_format: YYYY-MM-DD
time_format: HH:mm:ss

#分页,每页文章数量
per_page: 10
pagination_dir: page

#博客主题
theme: landscape

#发布设置
deploy:
  type: git
  #elfwalk改为你的github用户名
  repository: https://github.com/elfwalk/elfwalk.github.io.git
  branch: master